Tender loving care with first tree plant

Tender loving care with first tree plant

Tender loving care with first tree plant may be a reflection of the condition of your soul. Tender loving care with tree planting is good for you and your family.

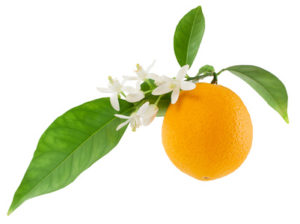
Planting and caring for the new tree is natural and logical prrogression of doing something meaningful well. When you have decided on which kind of fruit tree you would like, and where you would like it, you can finally start to plant it. If you buy your tree from a nursery, be especially careful when you are taking it from the nursery to your house. I once had a friend who put the tree in the back of his truck, but clipped a sign on the way home. The entire tree snapped in half, and my friend was left a very sad man.

Tender loving care with first tree plant
Tall pine trees in a forest


When you have gotten your tree safely back to your yard, look at the
bottom of it and see how big the clump of roots is. It may seem like a lot
of work now, but you want to dig a hole that is twice as wide as the
clump, and just a little less deep. Making the hole slightly bigger than
the clump of roots allows there to be room for the soil that you dug out
to be put back in. Otherwise you would be stuck with a giant heap of
unwanted dirt, and nowhere to put it. After you have dug the hole, line
the hole with some compost or fertilizer so that the tree will grow
better. After you have done this you should set your fruit tree into the
hole, and spread the roots out evenly so that the tree will be strong and
stable.

When all of this business is done, take the soil that you dug up and fill
in the hole completely. Unless you want big piles of dirt everywhere, you
should be sure you use all of the dirt even is it is a couple inches
higher than the rest of your yard. This is because it will compress when
watered. Before you firm up the soil, make sure that the tree is
completely vertical and will not fall over. After you have checked that
the tree is perfectly vertical you can gently firm up the soil.

If the tree’s trunk is not yet completely sturdy and can be bent, you need
to tie the tree to a stake with a bit of rope. Be sure not to tie the rope
tightly to the tree, as you need to allow room for the trunk to grow. Once
the tree is sturdy enough to withstand all types of weather, you can take
the stakes off of it. When all of this is done you should mulch around the
base of the tree. If you live in an area where wildlife can access your
yard, then you should put a fence around your tree, because some animals
will eat the bark off of young trees.

Tender loving care with first tree plant will yield rewards in time

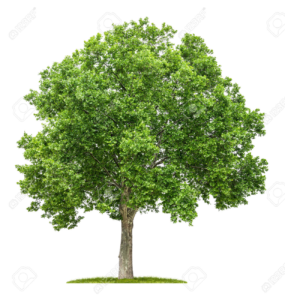
Once you have successfully planted your fruit tree it will start to bear
fruit after it is three to five years old. Once your tree starts to carry
a lot of fruit you should periodically pick some of the fruit so that the
branches aren’t weighed down too much. If the fruit gets too thick, the
branches can break off. On some years your tree might not bear as much
fruit as others, but this should not worry you. Healthy trees often take
years on “vacation” where they produce little or no fruit.

After you’ve planted your tree you might start to have some problems with
pests. To help keep these pests away, always rake away old leaves, brush,
or any other decaying matter that could be holding bugs that could be
harmful to your tree. During dry summer months it is a good idea to use tree bark or some other material to keep the moisture around the tree base, so that it will not evaporate into the air.

To make sure that your tree always stays healthy in the long run, you
should prune it during winter or spring. Water your tree every two weeks
during dry times, and be sure not to hit your tree with a lawn mower or a
weed eater because it could severely damage the growth process. Also just
make sure that your tree gets plenty of water and plenty of sun, and your
growing experience should be just great.

Thank your for visiting www.Howtoplanttrees.com and reading up on this important Tender loving care with first tree plant article post.  Please do share the links and the your likes with your friends.  Thanks.

Picking choice garden orange tree

Picking choice garden orange tree

Picking choice garden orange tree does need some local knowledge and information about the types of orange trees available. If you live in a hot, humid sub-tropical zone like Florida or California, you have many options for growing fruit trees. You are lucky enough to be able to support almost any type of plant as long as you prevent pests from taking over. You should consider growing an orange tree, as these are usually easy to maintain and produce some of the most delicious fruits. The orange is one of the most popular fruits worldwide due to its sweetness, juiciness, and distinctive flavor.

Picking choice garden orange tree
Orange fruit grow on orange trees

The orange tree can reach up to 50 feet in height towards its later years, so you should definitely take that into account when planning. Even if you’re starting with a very small tree, plan ahead and place it in an open area so that it will have plenty of room to expand. If you make the same mistake I did, you will end up having to renovate your yard to some extreme measures, such as taking out an entire shed. Just take the necessary precautions beforehand and avoid all of this trouble.

The ideal soil for growing an orange tree would be fine sand with great drainage. The soil should be deep enough to allow for extensive root development, since the trees are known for reaching monstrous sizes and requiring lots of support from down below. If you have shallow, easily saturated soil then you should either do something to remedy it or move onto a different type of tree. It is most likely that attempting to grow an orange tree in these conditions would be disastrous.

One of the more popular types of orange is the “Washington Navel”. It probably came about as a mutation of other oranges. It originated in Brazil around 1820, and had moved on to Florida within fifteen years. It is characterized by being one of the largest of all available oranges. The peel or rind is easily removed. Usually it is not as juicy as other oranges, but has an intense flavor. These are the most popular orange trees for commercial growing. If you decide on one of these trees, you probably won’t have to water as much.

Another type of orange is the “Trovita”. It was invented sometime in the early 1900s at a lab in California devoted to experimenting with new types of citruses. It started being publicly marketed around 1940. It doesn’t have a very strong flavor, and has more seeds than a Washington Navel. However, it was designed to be more adaptable to harsher, hot and dry environments that would not be acceptable for other types of orange. Some of the more popular oranges in Florida right now are mutations of this type.

Picking choice garden orange tree Valencia

The ‘Valencia’ is one of the most juicy and flavorful oranges. It is most popular in South Africa and the southern USA states and Australia. Until about 20 years ago, Valencia oranges made up a strangely large portion of the orange market due to its popularity. It is thought to have been invented in China. It has almost no seeds. Another subgroup of Valencia oranges are the “Rhode Red Valencia” oranges. These were created around 1960, so they are slightly more recent than other types. Various mutations occurred and the trees that grew as a product of them were large and extremely hardy. The oranges themselves are more juicy and less acidic than the standard Valencia oranges.

Orange trees are a great thing to get planted, because with just a little effort in the planting process you will be able to enjoy hundreds of delicious fruits every year. Just pick whatever orange sounds the most delicious, and go with it! Before you purchase a tree, you should of course consult a local expert to make sure your desired type will flourish in your area. Usually this won’t be a problem, but it is always good to make sure before you spend the money and time.

Planting method

From seed, seedling or a pot plant. Here is a guide for planting an orange tree that is a plant purchased from a nursery.

Location

Select a sunny location that has sufficient space, radius about 3 meters, the orange tree may grow eventually as high as 6 metres tall.

Soil

If possible choose a ground that has well draining soil, if the soil is naturally very clay orientated, or over sandy or rocky.

Compost mixture, create organic soil

With an orange tree plan that has grown in a pot plant, and if the pot plan size is approx, 20L container (approx, 30cm x 40cm), dig a hole that is 40cm deep, and 60cm wide. Combine and mix the compost potting mixture with the native soil mix 50/50, to ensure healthy growth of the orange tree root system.
Citrus greening is one of the most serious citrus plant diseases in the world. It is also known as Huanglongbing (HLB) or yellow dragon disease.

SAVE OUR CITRUS

Citrus greening is spread by a disease-infected insect, the Asian citrus Phyllis, and has put the future of America’s citrus at risk. Infected trees produce fruits that are green, misshapen and bitter, unsuitable for sale as fresh fruit or for juice. Most infected trees die within a few years. (Save Our Citrus.org)
Transplanting from the pot to ground.
Pop the orange tree out of the container and place it on the bottom of the hole, it should be at even level with the top of the pot plant to the ground level.
Use some organic slow release fertilizer, sprinkle it around the bottom of the hole and on around the root system, loosen some of the root system so that it is aligned out more and free. Do this before adding the 50/50 mixture and filling the hole around the transplanted pot plant.

Watering

Depending on the natural rainfall and the location, you need to keep checking the orange tree plant for it’s water sopil water content. Simply by using a garden spoon or a rubber glove over your hand.
Further fertilizing can be using chicken manure.

Planting method, pot plant.
Choose a pot plant that is at least 56 liters (15 Us gallons). There needs to be ample space for the root system to grow and to live in.

Potting soil mixture.
The potting soil mixture needs to be one that has good drainage, citrus trees really like to to have nutrition rich fertilizer, use a trusted Organic Citrus Fertilizer. Re fertilize the orange tree every 4-6 weeks, unless the instructions of the fertilizer say other wise.

Watering of a potted Orange Tree.
Depending what the natural rain fall, and the location, whether the natural rain fall can water the potted orange tree plant. You need to keep and eye on the soil, and feel whether it has dried out between watering. Make sure that the orange tree is not being deprived of water, it may mean that it needs to be watered at least twice a week.

Thank you for visiting www.howtoplanttrees.com web site and reading up on this important topic on Picking choice garden orange tree.  Please do be generous and share the web site link with your friends, they may also be thinking about tree planting during the early fall or the early spring season. Thank you for sharing online.

Growing Trees for Shade

Growing Trees for Shade

Growing Trees for Shade is a very practical idea for the areas of the world where the summer seasons are hot, and there are plenty of them. Outdoors during the hot summer can be refreshing if there is a natural breeze of the wind, it works really well with the cooler shade areas that may have a house shading the southern and western side where the sun shines all day at it’s hottest. Trees can be used to create more shade therefore making the area cooler. Seashores are often naturally cooler because of the continues breeze and the moisture that is in the air carried by the wind.

Growing Trees for Shade
Google Free image search

Growing trees for shade for the summer season

If you are currently trying to plant trees in order to shade your garden, you will probably want something that grows very fast and provides plenty of shade. With the many types of trees available, you will have no problem finding a variety that will grow extremely fast and provide all the shade that your garden needs to survive. There are also many things you can do to speed up the growth of trees.

Generally trees are separated into two categories: long lived and short lived. If you are just looking for some temporary shade for your garden, you should stick to a short lived tree. But if you plan on keeping it for years, go for a long lived tree.

Growing trees for shade may take more or less time

If you decide on a short lived plant, you are probably looking for something with speedy growth. This means the root system will be particularly aggressive, so be sure not to place it near any septic tanks or other deep rooted plants. If the roots have plenty of area to grow, then they will shoot out extremely fast and your tree will take off in growth. Your placement should also be based on the tree’s relative position to the area you are wanting to shade. You should keep it to the western or southern sides for maximum shading.

Preparing your soil well for the shade trees can be the best way to enhance the plant growth speed. The bigger hole you dig for the root ball, the better. Also when you dig out the soil from the hole, you should work it over well before you replace it. This will allow the roots to penetrate through the soil better. If you mix in all your fertilizer and nutrients to the soil before you replace it, you will end up with a superior tree. Also try to use organic materials as mulch. Bark and any branches or twigs work well for this, and will encourage the quick growth.

When you buy your shade tree, it will usually come with the root ball balled up and in a burlap bag. It might also be grown in a container or simply with bare roots. If you get a tree in a burlap bag, you should plant it anywhere between fall and early spring. Trees grown in containers are ok to plant at almost any time of the year. If the tree just has bare roots, then the ideal planting time is anytime in winter and early spring. If you buy a tree that has been grown in a container, make sure that the roots are not constricted by the container. This will usually cause the roots to go in circles underground after you plant it. After you buy the tree and before you plant it, be sure to constantly add moisture to it.

Growing trees for shade with the right knowledge of the tree root systems

The ideal planting process would include putting it in the ground at the proper depth, and replacing the soil without compressing it too much. Immediately after planting, you should give the tree its first watering before putting the layer of mulch on. You should always use organic mulch, and have a 2 or 3 inch layer of it at the base of your tree.

You should always use nitrogen fertilizer during the first segment of the tree’s life. Simply follow the instructions on the label in order to find out exactly how much to apply and when to apply it. Never apply too much fertilizer while the tree is young. You should usually wait until it has been established for about a year. The fertilizer that you do add should be sufficiently watered down.

If you are trying to grow a tree speedily, there are many more things that you need to consider. However, with proper planning you can create the perfect environment for the tree to spring right up and provide you with plenty of shade within months.

Thank you for visiting http://howtoplanttrees.com and reading this Information on Growing Trees for Shade article post. We hope this was helpful and useful to you.  Please do share this link with your friends, thanks.

Finding Drought Resistant Trees

Finding Drought Resistant Trees

Finding drought resistant trees is vitally important particularly if you live in an area that may have restrictions on the use of garden water during the hot summer months.  Many regions of the world are parched of natural water, you know better than anyone that one of the things that decides whether a tree survives or not is your ability to supply it with sufficient water, trees do get thirsty in the hot summers. Unfortunately, many people don’t take this in to account when buying a tree. They will just go for the nicest looking tree, and then wish they could give it more water. If you do a little planning before you rush out and buy a tree, you should be able to find trees that can survive on lower amounts of water.

Usually the most adaptable plants are the ones that are indigenous anyways. If you live in a zone that is suffering a water crisis, usually the only plants that survive are the ones that have been there all along. This is because they are used to the conditions and know how to survive. Just take a drive through the undeveloped regions of your city, and look at what trees are green. Find out their names, and buy them. They might not be the most attractive trees, but you rarely have to make any modifications to your soil to get them to grow.

One of the trees that will grow almost anywhere without using much water is the “Scotch Pine”. Not only does it grow at a very fast rate of 20 or more inches per year, it is hardy and drought tolerant. It usually grows between 25 and 35 feet, and it extremely easy to get started. Most nurseries sell these trees, especially in areas with lower amounts of water. There are many varieties available. Many fade to a yellowish brown color during the colder months, and this is usually what causes some people to dislike them and others to love them. However, there are varieties available that do not do this.

The Rocky Mountain Juniper is an extremely hardy and easy to grow tree. Its bark also turns a browner color during the winter, and rejuvenates in late spring. They are frequently used as windbreaks because of how tough they are. These trees are also great if you are trying to attract different varieties of birds to your yard. They provide great branches to nest in. Unfortunately the Rocky Mountain Juniper doesn’t grow as fast as other hardy plants like it. The rate is less than 10 inches per year.

Another one of the most popular drought resistant trees is the Russian Olive. This tree is impressive and will definitely turn some heads once it is fully grown. It is more decorative than the trees mentioned above, and will reach 20 or 25 feet once it is fully grown. They are able to grow in almost any soil, and attract birds with the berries they produce.

As you can see, there are many options for you if your water is limited. There are many others that I have not mentioned, and depending on your area you may be able to find a preferable variety. Do a Google search for hardy plants that will survive in your area, and you should be presented with a large list. If you can’t find that list, just go outside and see what is currently flourishing. That is the best indication of what you should buy.

Thank you for visiting How to plant trees web site and reading up on this Finding Drought Resistant Trees article. i hope this was informative, useful and helpful to your tree planting endevours. Please do share tree planting info with friends, thanks.

Planting the first tree

Planting the first tree

Planting the first tree can really be a memorable unique tree planting experience. Almost everyone’s first tree experience has some embarrassing events. Nobody can be an expert right away; we all make mistakes that sometimes haunt us for years afterwards. Some of us make worse mistakes than others, though. I think that if there was an award for being the most naive person to ever attempt growing a tree, I would win.

Planting the first tree
Maple tree

When I decided to plant a tree of my own, I had the perfect spot in mind. There was a gap between my house and my fence of about 5 feet. It was probably the least traveled area of my whole lawn, and I thought it could use something to spice it up. Maybe if I provided some lovely shade, it would become more used by my family. I envisioned a little picnic paradise in the shade, where my family could go just to be with each other and nature. Boy was I wrong.

I decided on a nice apple tree. Despite the risk of apples falling on our heads, I thought it would be a treat to sit under the shade and munch on delicious home grown apples. Just the thought of this romantic, poignant activity was enough to make me drive my self to the nursery and purchase the first apple tree in sight. I didn’t know enough about trees to look at the roots or any of the signs that it could be an unhealthy tree. I spent the required amount of money and had the tree delivered right to my house.

I dug the hole right where I wanted the tree. This took almost the rest of the day. Holes are an easy thing to underestimate. It’s easy to say that a hole will only take an hour or two, but once you actually start digging it usually progresses a lot slower than you would have estimated. By the time I actually got the hole big enough to fit the ball of roots, I certainly didn’t feel like digging another few feet around the perimeter as most tree planting guides suggest. I was just ready to place the tree. With the help of my morbidly obese neighbor, I lifted the tree across the yard and dropped it into my hole. Then, it was time to fill in the hole.

I couldn’t have been happier once I filled in that last shovel load of dirt. I stood back to admire my work. That was when my 3 year old daughter said something that crushed my spirits, and haunts me to this day. “Daddy, that tree stands up like grandpa!” My father is a great man, and if she had compared any other aspect of the tree to him I would have considered it an honor. But unfortunately his back has been deteriorating lately, and he can’t stand up very straight. I noticed that my tree did indeed have a similarity to his posture.

Thinking this was a problem that the tree would naturally outgrow, I decided to leave it for a while to see what happens. Every day I went out to check on the progress of the tree; to see if it was any straighter than it was the day before. I daily had my spirits crushed when I saw that it had not improved at all. Not wanting to put forth the effort of removing it from my yard, I decided to just forget about it. I never went over to that side of the house again and almost completely pushed the tree from my mind. I decided that if any problem ever came about from leaving the tree there, I would pack up my furniture and flee the state. That’s how much I was humiliated by my tree experience.

After about 3 years of completely ignoring that the tree ever existed, I was sitting in my house one day and heard a loud crash. I ran outside to see what the problem was, just to see that my tree had grown to such an unmanageable size that it had taken out my gutter and part of my neighbor’s fence. I moved out of state within a week.

How to Grow Maple Tree from a Plant

How to Grow Maple Tree from a Plant

How to grow maple tree from a plant does require some basic tree planting knowledge.  The location for the maple tree should be where there is a full sun, plenty of room and good the drainage of the soil naturally, if the soil is not naturally draining then preparation of the soil is necessary. Adding sand and compost mixture to the natural soil will improve the quality and the drainage of the soil.
How to test, and to be sure of the drainage.

How to grow maple tree from a plant
Maple tree leaves

You can test the ground by digging a hole at the site where you plan to plant a maple tree. If it is a lawn covered area, cut the perimeter of the area to be dug with a spade (e.g. 60cm diameter), remove the lawn in a thick slab of about 10cm to 15 cm thick, shift it to the side, so that the lawn won’t get damaged.

Start digging the hole to a depth of about 40cm deep. After the hole is dug out, fill it water, and watch how long it takes for the water to drain, but be very careful if there are young babies or children in the area, not advised to do this if there are.

Maple tree plants require a healthy dose of nutrients from the soil, particularly when the young plant is growing up. Taking into consideration the location for the maple tree plant, and the preparation of the soil when digging the hole, to ensure healthy root growth and expansion is very important.

When to Plant a maple Tree?

Planting a maple tree into the ground should be done in the beginning of the autumn season, the thing to keep in mind is that the tree needs sufficient time for the roots to get a hold and grow in the new soil environment.

During the fall season the maple tree will grow roots instead of leaves. This should be far enough in advance before the cold winter sets in with sub zero temperatures.
Variation does happen in the change of seasons (early winter, or late winter, etc) , so if not familiar with your environment and the seasons, then ask a local gardener or a local garden centre for advice.

Fertilizing the soil other than using compost mixture in the fill mix is not recommended for the root growth, it is recommended during the spring and summer season for leaf and trunk growth of the maple tree plant.
So allow the maple tree plant to grow its own root system if planting during the autumn season for the roots to take hold in the ground naturally.

How to plant trees

How to plant trees

How to plant trees is a very important question, the personal reasoning behind planting trees can be varied, it may be for the trees visual effect on the space, structures and the buildings, or the effect that it has on the given back yard. It may be for the ornamental effect during a particular season, e.g. the spring and the summer season when the trees blossom and bloom. Or it could be for the splash of colors that insidious trees perform during the autumn season. Watch this YouTube video.

Trees are have another practical side, they provide shade and protection, especially in the warmer and hot climates, trees are ideal place for birds to nest and rest from the heat of the mid summer sun, not only for people, but also for live stock, domestic animals and other animals and birds.
In the wild animals and birds often rest and sleep under or in the shade of a tree during the heat of the day. During a heavy rain birds also find shelter under the canopy of a tree, and at the same time are protected from their predators from the ground.

Face Book Fan page from here for you to Like.

Trees also are a great resource for food, the most common trees for food source are; fruit trees, and nut trees.
These are some of the many multi-tasking and convenience that trees generously give for humans, birds, bees, butterflies, insects and other animals:

  • Provide cool shade
  • Shelter and protection from predators
  • A place for birds to build a nest in
  • A great food source, aroma therapy, and visual enlightenment
  • Natural fiber material from the wood, leaves and flowers for domestic use
  • Decorations and as disposable plates
  • Firewood for cooking and for winter warmth
  • Manufacturing of paper and cardboard
  • Constructing material for buildings and housing

Here are many resources of useful information on this web site on How To Plant Trees.  You will find much useful information and links to expert advice and Resources that you need when learning How To Plant Trees.

Than you for visiting http://howtoplanttrees.com web site, and please do share the links with your friends, thanks.

Welcome How to plant trees

Welcome How to plant trees

Welcome How to plant trees wite, this is the first post at this WordPress site.  Many important topics about trees are posted, presented and discussed here at this How to plant trees site.

Removing Old Trees

Removing old trees may be a mixed emotions of a an experience, there are many memories and possibly personal attachment to trees that may have been planed by previous generations or family members.  Planting your own trees and seeing them wither away may also bring up emotions. Sometimes a tree gets to the point naturally where it is necessary to say goodbye to it. It can be a painful choice to make, but sometimes the tree gets too close to the house, gets too diseased, gets an incurable infestation of some pest, or grows too tall and gets close to a power line. If any of these things occur, its best to do the right thing and get rid of the tree. Although you might have spent hours and hours getting the tree to where it is today, it is almost dishonorable to the tree to allow it to suffer in bad conditions.

Once you have made the choice to remove the tree, you need to plan its removal. I can’t begin to count how many windows I’ve seen knocked out or cars I’ve seen crushed because of poor planning in the tree removal process. Decide what direction you want it to fall, and accurately measure to make sure it will fall completely clear of anything else that it could possibly cause damage to.

Once you have the falling direction planned out, you should climb up the tree and tie two long ropes near the top. Anchor them on the opposite side of the one that you want it to fall towards. This will allow you to adjust the direction the tree is being lowered in, just in case it starts leaning towards anything it could destroy.

Now that you’ve taken all the necessary precautions, you are ready to begin chopping. If you plan on using a manually operated saw or axe, please step back and consider how insane that is. Chopping down a tree by hand will take you forever, and will not even begin to be as accurate as using a chainsaw. If you don’t have a chainsaw, you shouldn’t even consider doing it without one. Ask around with your neighbors and see if anyone has one that you could borrow. If that doesn’t work, rent or buy one from your local home improvement store.

Damage control and prevention

Before you start chopping away at the tree, you should wear proper eye and face protection in case any wood chips fly towards your eyes. I had a friend who blinded his right eye while cutting down a tree, so I hope all of my readers do not make the same mistake as he did. Whenever you operate a power tool, always be sure to wear proper protection for any exposed parts of your body.

When making the cut, you do not want to just cut a straight line into the tree. It is best to cut a sideways “V” into the tree. This is because if you cut the straight line, the tree will end up rolling to one side or the other. If you cut in a “V”, the tree will be able to fall in the exact direction that you want it to fall. Occasionally it might be a few feet off due to human error during the cutting process, but if you have some strong friends pull on the ropes you tied, you can line it back up with the path you wanted it to take. The entire process shouldn’t take more than an hour.

Removal of the stump can be slightly more difficult. You have several choices; you can rent out a stump chipper that will completely destroy the visible section of the stump. Or you can spend countless hours digging it out. Digging out the stump is much more thorough, but takes forever. If you have kids this shouldn’t be a problem. Kids often find the thought of digging fun, and are excited to go outside and dig all day long with their friends. This was the method I used, and I had the entire stump out within a week. Keep in mind that my stump was about 1 foot in diameter, and digging probably won’t work for stumps much larger than that.

Thank you for checking out this www.howtoplanttrees.com web site and reading up on this Welcome How to plant trees article. I hope this article was informative, helpful and useful, and don’t forget to share this web site link information online with your friends, thanks.